Charting an Injectable Treatment
patientNOW offers a quick way to chart your injectable treatments and refer back to previous treatments. The full instructions for this process are below; you may click any of these shortcut links to go directly to that topic.
Move to Daily Workflow and Identify your Patient
Review Current Medical Information
Completed Restylane Injection Record
Completed Sample Botox Injection Record
Move to Daily Workflow and Create Encounter Note
Move to Daily Workflow and Identify your Patient
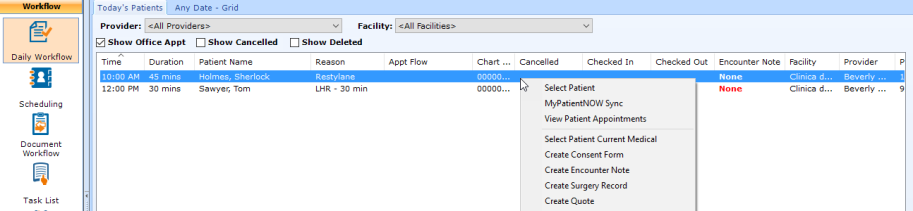
Navigate to Workflow | Daily Workflow, Today's Patients tab.
Note: For clinical staff, we recommend the Button Click on your Favorites be set to Daily Workflow. For additional information, check out Configuring and Using Favorites. If you do not see the Encounter Note column, you may review the Customize Column Order page for tips.
Right-Click on the patient and click Select Patient Current Medical.
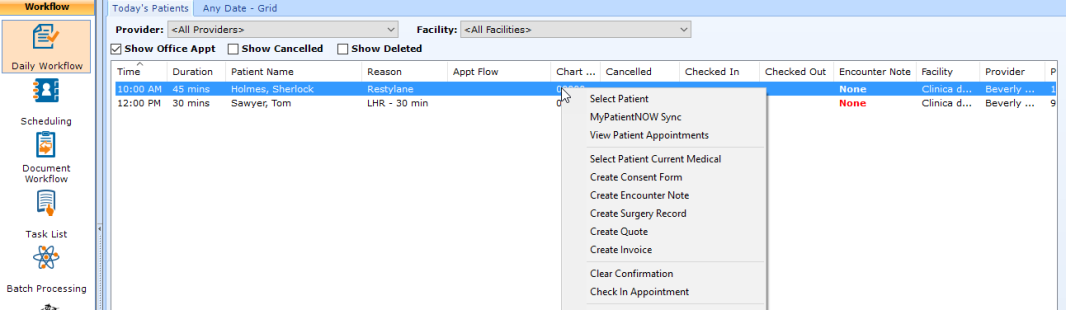
patientNOW will place that patient in focus and move you to the Patients | Clinical Information, Current Medical tab.
Review Current Medical Information
Review the clinical information provided by the patient and documented by your practice.
- Allergies
- Medications
- Problem List / Diagnosis
Navigate to Medical History tab and review.
Navigate to Injectables tab and review past injectable treatments.
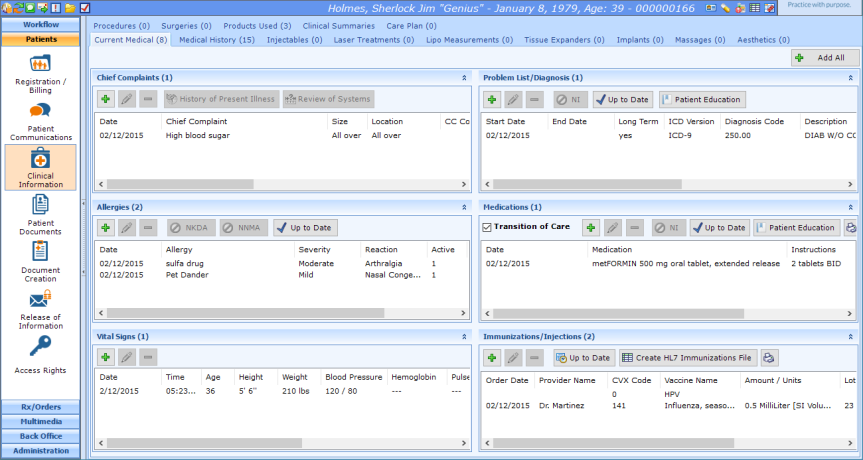
Our patient, Sherlock Holmes, will be getting Restylane and Botox today.
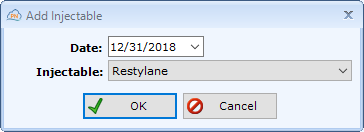
Add Injectable Record
Since you are already on the Injectables tab, select the Add button at upper right side of screen.
- The Date will default to today.
- Select the Injectable.
- Select OK
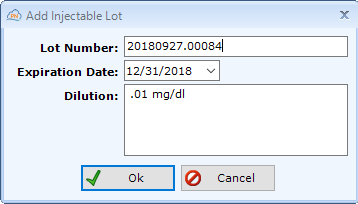
Enter Lot #
Select Add under the Lot Information Section.
Enter Lot number, Expiration, and Dilution.
Mark-up Image
You may use any combination of these tools. Many offices use specific colors and pens / highlighters for specific injectables (e.g. Botox is blue medium point and Restylane is yellow highlighter). If you choose to do this, you should have a policy so that all providers use the same colors and styles for each injectable.
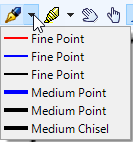
| Select Pen |
|
Select a fine or medium point pen in red, blue or black. |
| Select Highlighter |

|
Select thickness and color for highlighter tool. |
| Place Sequential Numbers |

|
Each time you click on image, the next highest number is placed on the image in the color selected in the Change Color button. |
| Place X |

|
Each time you click on image, an X is placed on the image in the color selected in the Change Color button. |
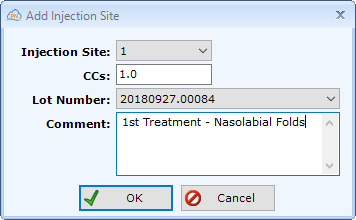
| Place Text |

|
Each time you click on image, a box pops up asking for the text. This is recommended if you want patientNOW to calculate the total units based on units per site. Just select Auto add sites when adding image text. |
| Change Color |

|
Selects the color to be used when placing sequential numbers, Xs, or Text. |
| Erase All | 
|
Warning: Take great care with this button. When selected, it erases EVERYTHING you have previously placed on the image. |
| Undo Last Change | 
|
Removes the last markup you placed on the image. |
| Select Image | 
|
Allows you to select a different image to markup for this injectable treatment. |
Add Injection Site(s)
For filler injections, you may only have one entry here and use the highlighter to show the area that was injected. If you have more than one Lot #, you should have at least one separate site for each Lot #.
With neurotoxins, you may want to document the number of units you placed in each area; see Place Text button above.
Select OK.
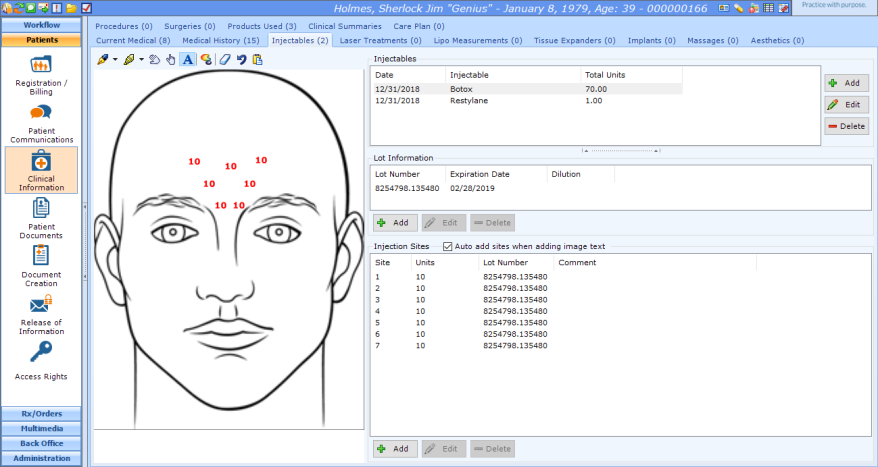
Completed Restylane Injection Record

Completed Sample Botox Injection Record
Move to Daily Workflow and Create Encounter Note
Navigate to Workflow | Daily Workflow, Today's Patients tab. Note: If you start note from here, the Date of Service and Provider will always be correct.
Right-Click on the patient and Select Create Encounter Note.
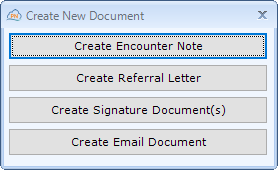
Create Encounter Note
The Create New Document dialog appears.
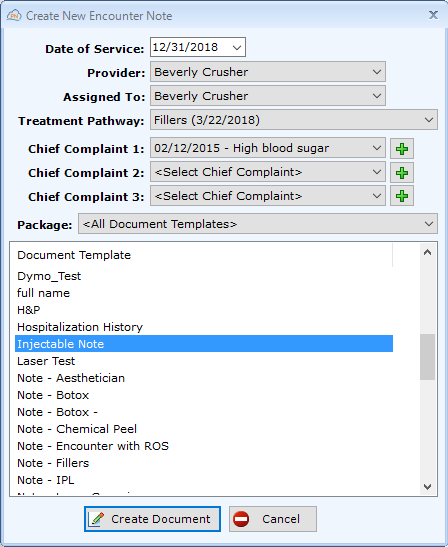
The Create New Encounter Note dialog appears.
Confirm that the information at the top of the dialog is correct.
Select Injectable Note. Note: your note may be named something different. If you would like to use the format below, see Document Template Library
Select Create Document.
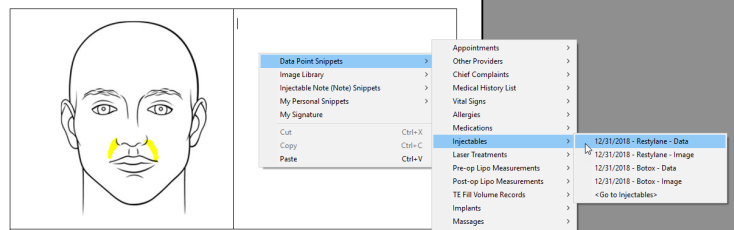
patientNOW will place that patient in focus and move you to the Patients | Document Creation with the Injectables Note in focus.
Notice that all of the treatments are automatically dropped in, usually images first and then data or vice versa.
Confirm that the information at the top of the note is correct. You may add or edit the information at this point because the note is not Completed.

Right-click, select Injectables and then the second treatment data (in this case the Restylane data).
Confirm that you have no changes or additions to the aftercare instructions.
Select the pen above the note  to place your signature on the note.
Encounter Notes have 2 states.
- Saved. These documents can be edited or deleted because they are not complete. They are visible in Patients | Document Creation and Workflow | Task List, My Open Tasks tab - My Open Documents section.
- Completed. These documents may not be edited. They are visible in Patients | Patient Documents, and if they are assigned to a patientNOW User, in Workflow | Document Workflow, My Assigned Documents tab.
Select one of the following.
|
Saves any changes you have made and sets the state to Saved. By default, the document will remain assigned to you until Completed. |

|
Sets the state to Saved and reassigns the document to another patientNOW user. |
|
Sets the state to Complete and removes any assignment to any patientNOW User. |

|
Sets the state to Complete and reassigns the document to another patientNOW user. |

|
Sets the state to Complete, adds the document to Release of Information and moves you to Patients | Release of Information. |
|
Sets the state to Saved and prints the document. Warning: printing a document in Saved state is NOT recommended because the printed copy may not be the same as the final Completed version. |
|
Deletes the document. Warning: this should only be used in case of error (wrong note or patient) or duplication. Deleting a document may have unintended legal consequences. |

|
Sets the state to Saved and displays the separate Get Signature functionality. Note: the link fields for patient initials and patient signature must be in the template when the encounter note is created; they cannot be added after the fact. Also, the user will need to enter their password to get back into patientNOW. |

|
Sets the state to Saved, and moves you to RX/Orders | Orders / Requisitions section. |